> ## Documentation Index
> Fetch the complete documentation index at: https://specterops-feat-poc-api-playground.mintlify.site/llms.txt
> Use this file to discover all available pages before exploring further.
# Create a Data Collection Schedule
 ## Purpose
This article outlines how to create a collection schedule on a collector client that will ensure continuous data collection. BHE administrators should use it when deploying a new client or adding an additional schedule to an existing client.
Generally, Azure and Active Directory Structure do not change significantly enough to warrant more than daily collection. Local Groups and Sessions can be scheduled to collect every 7 hours to ensure a good sampling of round-the-clock activity.
## Prerequisites
* Creation of one SharpHound Enterprise client, see [Create a SharpHound Enterprise collector client](/collect-data/enterprise-collection/create-collector)
* Logged in as a user role which is authorized to modify clients, see [User Role Definitions](/manage-bloodhound/auth/users-and-roles)
## Process
1. In the top right, click settings ⚙️ → **Administration**
## Purpose
This article outlines how to create a collection schedule on a collector client that will ensure continuous data collection. BHE administrators should use it when deploying a new client or adding an additional schedule to an existing client.
Generally, Azure and Active Directory Structure do not change significantly enough to warrant more than daily collection. Local Groups and Sessions can be scheduled to collect every 7 hours to ensure a good sampling of round-the-clock activity.
## Prerequisites
* Creation of one SharpHound Enterprise client, see [Create a SharpHound Enterprise collector client](/collect-data/enterprise-collection/create-collector)
* Logged in as a user role which is authorized to modify clients, see [User Role Definitions](/manage-bloodhound/auth/users-and-roles)
## Process
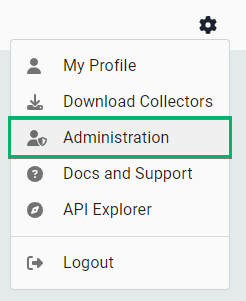
1. In the top right, click settings ⚙️ → **Administration**
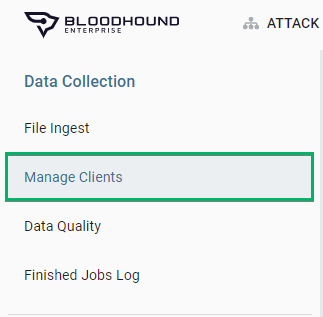
 2. In the top left side, click **Manage Clients**
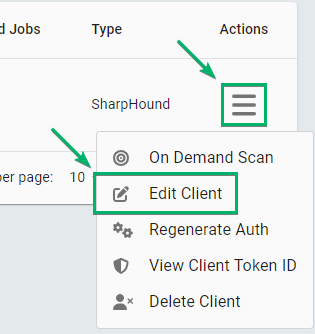
 3. On a client, click the burger menu and select **Edit Client**
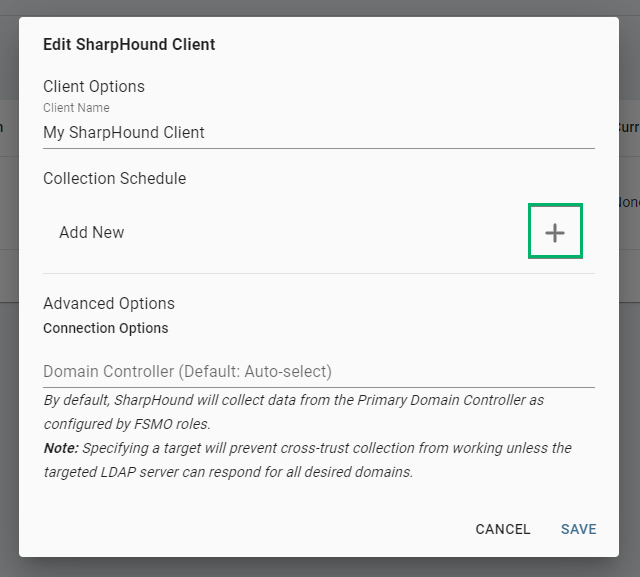
 4. In the *Edit SharpHound Enterprise Client* window, under the heading *Collection Schedule*, click the **+ icon** to add a new schedule.
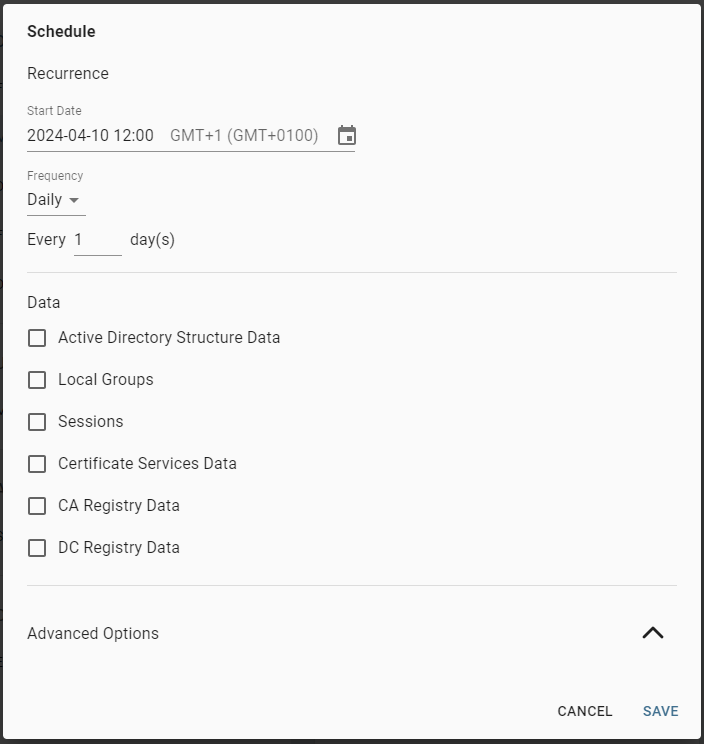
 5. In the *Schedule* window, configure the schedule:
* **Start Date**: The time on which the first collection should run
* **Frequency**: The frequency of the schedule
* **Data**: The type of data the schedule collects, see [SharpHound Data Collection and Permissions](/collect-data/permissions)
* **Advanced Options**: See the [Scanning section in the article SharpHound Enterprise Tenant Configuration](/install-data-collector/install-sharphound/tenant-configuration)
5. In the *Schedule* window, configure the schedule:
* **Start Date**: The time on which the first collection should run
* **Frequency**: The frequency of the schedule
* **Data**: The type of data the schedule collects, see [SharpHound Data Collection and Permissions](/collect-data/permissions)
* **Advanced Options**: See the [Scanning section in the article SharpHound Enterprise Tenant Configuration](/install-data-collector/install-sharphound/tenant-configuration)
 6. Save the schedule by clicking **Save**
7. Save the collector client by clicking **Save**
## Outcome
The client is now configured for continuous data collection with one schedule. You can add multiple schedules to a single client for more granular control.
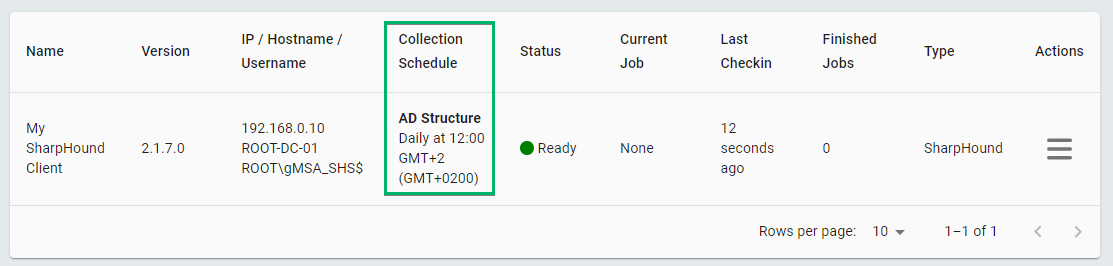
A brief of a client's schedule is shown in the client table's column *Collection Schedule*.
6. Save the schedule by clicking **Save**
7. Save the collector client by clicking **Save**
## Outcome
The client is now configured for continuous data collection with one schedule. You can add multiple schedules to a single client for more granular control.
A brief of a client's schedule is shown in the client table's column *Collection Schedule*.
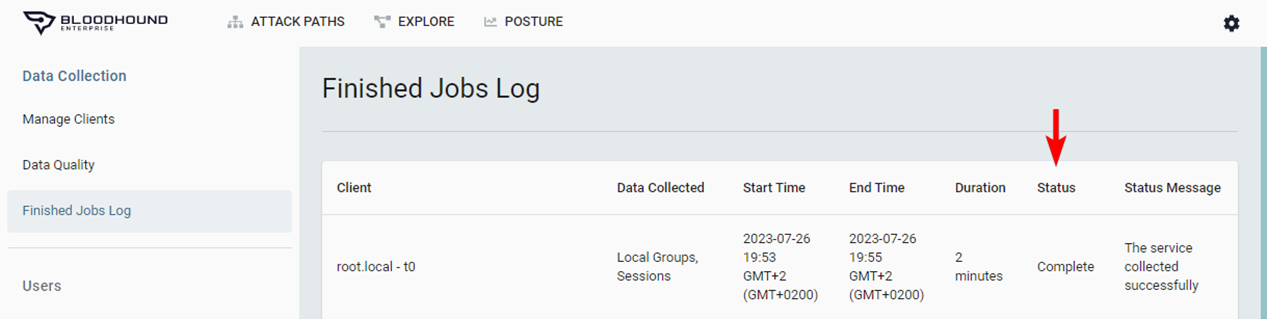
 After the next schedule, see the job's status in the *Finished Jobs Log* by clicking ⚙️ → **Administration**, and in the top left side, click **Finished Jobs** **Log**\_. \_The columns **Status** and **Status Message** report on the job's completion.